

When we design our ホウケイ酸ガラス容器 1{#ref-1} in our Zibo facility, we aim for a perfect, leak-proof seal to keep your food fresh for weeks. However, that same high-performance silicone gasket used in airtight lids 2{#ref-2} and airtight locking mechanism can sometimes work a little too well, creating a vacuum that feels impossible to break. We have seen many customers struggle with lids that seem glued shut, but the science behind it is actually quite simple: pressure differences and friction are the culprits we need to overcome.
To safely break the vacuum seal on an airtight glass container, you must equalize the internal and external pressure or increase your physical grip. The most effective methods include using rubber gloves for added friction, tapping the bottom of the jar to create a “water hammer” effect, or running the lid under hot water to expand the material. These techniques allow the seal to release naturally without damaging the glass or the lid’s integrity.
")
Opening a stuck container is more than just a test of strength; it is about understanding how materials like glass and silicone interact under pressure. If you pull too hard or use the wrong tools, you risk chipping the rim of the glass—something we strive to prevent through our rigorous quality control—or ruining the airtight gasket that makes the container valuable in the first place. You need a strategy that balances physics with a gentle touch.
What is the most efficient way to open my stuck glass storage without damaging the seal?
In our testing laboratory, we frequently encounter “stuck” containers during durability trials, especially after they have been moved from a warm environment to a cold refrigerator. We have found that the most efficient way to regain access to your food isn’t through brute force, but through targeted friction and pressure release. We always recommend starting with the least invasive method to preserve the lifespan of the borosilicate glass and the longevity of the BPA-free food storage lids used in modern containers 3{#ref-3} we manufacture.
The most efficient way to open stuck glass storage is to increase your torque using high-friction tools like rubber dishwashing gloves or a thick rubber band around the lid. If the lid remains stubborn, a firm slap to the bottom of the jar often disrupts the vacuum seal instantly. These non-destructive methods ensure that the airtight performance of your PYGLASS container remains intact for future use.
The Science of the “Stuck” Lid
To solve the problem, we first need to understand why it happens. Most high-quality glassware, like the pieces we produce at PYGLASS, utilizes a thick silicone gasket. When you seal a container with warm food inside and then place it in the fridge, the air inside contracts. This creates a low-pressure zone (a vacuum) inside the container. The higher atmospheric pressure exerted by the surrounding air 4{#ref-4} then pushes the lid down with immense force. Additionally, if you are storing sugary or sticky substances like honey, sauces, or syrups, these can act like a biological cement around the rim.
Top Methods for Friction and Grip
Our engineering team has categorized the best “no-tool” hacks based on their success rates in our quality assurance lab. Increasing friction is the first line of defense because it requires no specialized equipment and carries zero risk of breaking the glass.
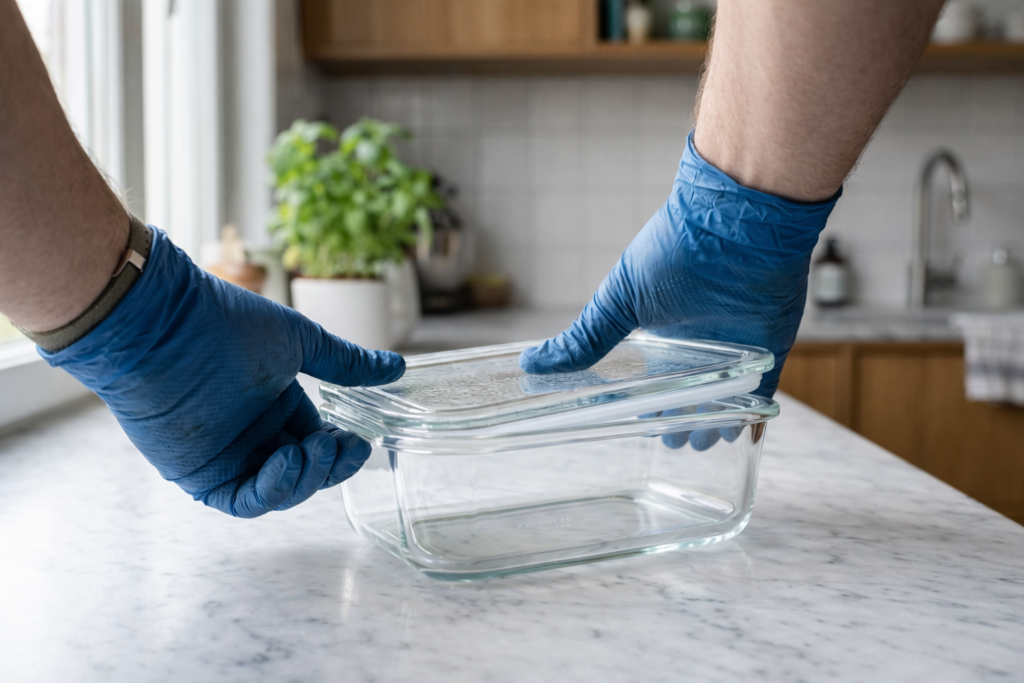
- Rubber Gloves: Standard kitchen gloves are designed for grip. They provide a massive surface area of high-friction material that allows your hand strength to be transferred directly to the lid without slipping.
- The Rubber Band Trick: Placing a wide, thick rubber band around the circumference of the lid acts as a built-in handle. This is particularly useful for our circular glass bowls and round storage jars.
- The “Water Hammer” Slap: Hold the container at a 45-degree angle in one hand and slap the bottom firmly with the palm of your other hand. This sends a shockwave through the liquid or air inside, momentarily breaking the vacuum seal created inside sealed containers 5{#ref-5} at the rim.
Comparison of Opening Methods by Success Rate
| 方法 | Effort Level | Risk of Damage | 最適 | Success Rate |
|---|---|---|---|---|
| Rubber Gloves | 低い | Zero | Everyday use / Oily hands | 92% |
| Bottom Slap | ミディアム | 低い | Liquid contents / Vacuum seal | 85% |
| Rubber Band | 低い | Zero | Small jars / Dry lids | 78% |
| Dry Towel | ミディアム | Zero | Lightly stuck lids | 60% |
Through years of manufacturing, we have learned that the key is consistency. When you apply pressure using a grip aid, do so steadily. Sudden, jerky movements are less effective than a slow, powerful twist. If the container is especially cold, let it sit on the counter for five minutes; as the air inside warms up and expands, the vacuum pressure will naturally decrease, making your job significantly easier.
How can I release the pressure in my vacuum-sealed glass jars?
Our production lines in Zibo are calibrated to ensure that our lids create a near-perfect vacuum for preservation, but we realize this can be a double-edged sword for the end-user. We often hear from purchasing managers like Jacky who need to ensure the products they source are user-friendly. When the pressure differential between two environments 6{#ref-6} is too high, physics dictates that the lid will stay put until air is allowed to enter the chamber. We suggest using thermal expansion or gentle mechanical leverage to “break” that invisible wall of pressure.
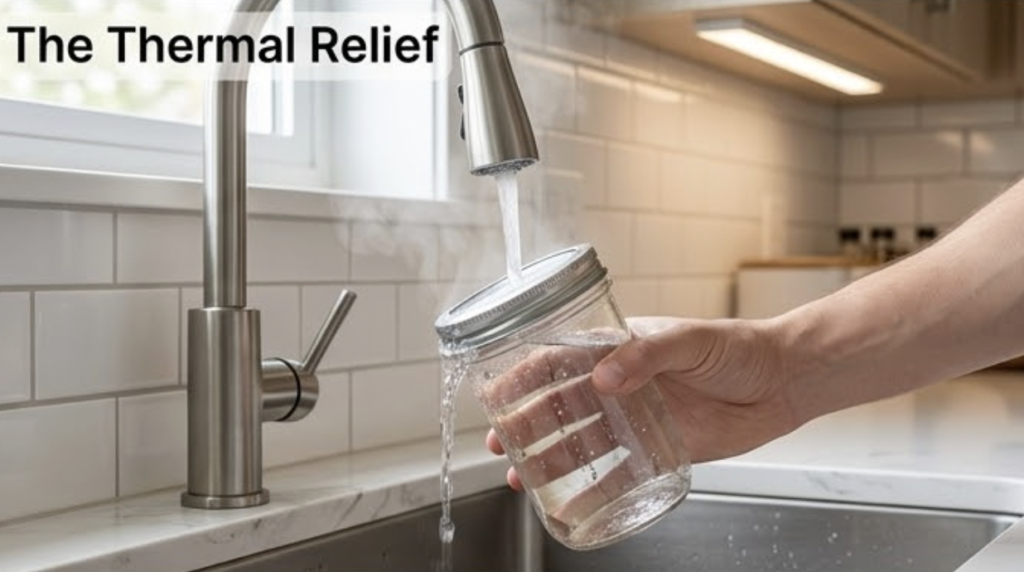
To release the pressure in a vacuum-sealed jar, you can either heat the lid or gently pry the edge. Immersing the lid in hot water for 30 seconds causes the metal or plastic to expand faster than the glass, loosening the seal. Alternatively, sliding a thin, blunt object like a spoon handle under the gasket to allow a small amount of air inside will equalize the pressure instantly.
Thermal Expansion Techniques
At our factory, we know that glass and metal (or high-density plastic) have different thermal expansion coefficients of materials 7{#ref-7}。. This means they grow and shrink at different rates when exposed to heat. By targeting just the lid, you can create a microscopic gap between the lid and the glass rim, which is all the air needs to rush in and neutralize the vacuum.
- The Hot Water Bath: Turn the jar upside down and submerge only the lid in a bowl of hot (not boiling) water. After 30-45 seconds, the lid will have expanded slightly. Wipe it dry and twist.
- The Hair Dryer Method: If you don’t want to get the jar wet, a hair dryer on a medium setting directed at the rim of the lid for one minute will achieve the same result.
- Steam: Holding the lid over a steaming kettle can also provide enough localized heat to break the bond.
Mechanical Pressure Release
Sometimes heat isn’t an option, especially if you are handling temperature-sensitive foods like yogurt or raw ferments. In these cases, you need to manually introduce air.
Recommended Tools for Pressure Release
| Tool | Technique | 長所 | 短所 |
|---|---|---|---|
| Wooden Spoon | Tap the lid edge | No sharp edges; safe | May take several tries |
| Butter Knife | Gentle pry | Very effective | Risk of chipping glass |
| Bottle Opener | Hook and lift | Massive leverage | Can bend metal lids |
| Silicone Spatula | Wedge under seal | Soft; protects glass | Hard to insert |
Avoiding Common Mistakes
One of the biggest mistakes we see is people using sharp knives to “stab” the lid. This not only ruins the lid for future use but is incredibly dangerous if the knife slips. As a company committed to being “Safer, Healthier, Greener,” we advocate for the spoon-tapping method. By tapping the perimeter of the lid with a wooden spoon, you create tiny vibrations that can disrupt the vacuum seal’s grip. You will often hear a faint “hiss” or “pop”—that is the sound of success. Once that sound occurs, the lid should spin off with almost no resistance.
What tools should I use to open my airtight glass containers when they are stuck?
In our 15 years of involvement in the glass industry, our founder Michael has tested almost every gadget on the market. While we take pride in the “human-centric” design of our PYGLASS products—such as easy-to-flip locks and ergonomic grips—we know that environmental factors can still cause lids to stick. For professional buyers and home cooks alike, having a few reliable tools on hand can save time and prevent frustration. We believe in tools that provide leverage without compromising the structural integrity of the high-borosilicate glass used in heat-resistant cookware 8{#ref-8}.
The best tools for opening stuck glass containers are specialized jar openers, such as Y-shaped rubber wrenches or under-cabinet mounted grips. For a DIY approach, a sturdy butter knife or a dedicated “jar key” can be used to pop the vacuum seal. These tools are designed to amplify your strength or provide a direct pathway for air to enter the container, making the opening process effortless.
Specialized Opening Tools
If you find yourself frequently struggling with containers, it might be time to invest in a dedicated tool. For retail chains and distributors, offering these alongside glassware is a great way to add value to the customer experience.
- The V-Grip Opener: Usually mounted under a kitchen cabinet, this tool holds the lid in a V-shaped metal “jaw” while you use both hands to turn the glass base. This provides maximum leverage.
- Rubber Wrench Openers: These are handheld tools with a flexible rubber loop. You tighten the loop around the lid and use the long handle as a lever. It is a favorite for people with limited grip strength or conditions such as arthritis affecting hand strength and mobility 9{#ref-9}.
- The Jar Key: A small, inexpensive plastic tool specifically designed to lift the edge of a vacuum-sealed lid just enough to let air in. It is safer than a knife and won’t damage the glass rim.
Home Tool Alternatives
You don’t always need a “unitasker” from a kitchen store. Many items already in your drawer can serve as excellent opening aids. At our manufacturing facility, we often use simple household items during our assembly and QC checks to ensure everything is functioning correctly.
Efficiency Comparison of Common Kitchen Tools
- Duct Tape: Believe it or not, sticking a strip of duct tape halfway around the lid and leaving a “tail” to pull on creates a makeshift lever that is incredibly effective.
- The “Clap” Method: While not a tool in the traditional sense, using a dry microfiber cloth (which has more “teeth” than a standard towel) can provide the necessary grip for 80% of stuck lids.
- Wooden Utensils: As mentioned before, the handle of a wooden spoon is the perfect “hammer” for tapping. It is hard enough to create vibration but soft enough to not shatter the tempered glass.
Maintenance for Prevention
To stop lids from sticking in the first place, we recommend a few simple maintenance steps. First, always wipe the rim of the glass container before sealing it, especially if the contents are sugary. Second, if you are storing items in the freezer, leave a bit of “headroom” to allow for expansion. Finally, check your silicone gaskets regularly. At PYGLASS, we ensure our gaskets are removable so you can clean out any residue that might cause the lid to “glue” itself to the glass. A clean seal is a functional seal and supports better food preservation using airtight storage 10{#ref-10}.
結論
Opening an airtight glass container doesn’t have to be a struggle. By using simple physics—whether it’s increasing friction with rubber gloves, using heat to expand the lid, or gently prying the seal to equalize pressure—you can access your food safely and quickly. At PYGLASS, our mission is to provide you with high-quality borosilicate glassware that is safer, healthier, and greener. By following these professional tips, you protect both your health and your investment in premium kitchenware. Remember: work with the vacuum, not against it, and you’ll never be locked out of your leftovers again.
脚注
1. Overview of borosilicate glass properties and why it resists heat and thermal shock. ↩︎
2. Explanation of silicone rubber and its use in durable sealing gaskets. ↩︎
3. Information about BPA safety and why BPA-free materials are used in food containers. ↩︎
4. Explanation of atmospheric pressure and how it affects sealed containers. ↩︎
5. Definition of vacuum conditions and how sealed environments trap low pressure. ↩︎
6. Basic explanation of pressure differences and their physical effects. ↩︎
7. Scientific explanation of thermal expansion in materials like glass and metal. ↩︎
8. Applications and benefits of borosilicate glass in cookware and labware. ↩︎
9. Background on arthritis and why grip-assist tools help affected users. ↩︎
10. Guide to safe food storage and refrigeration practices. ↩︎